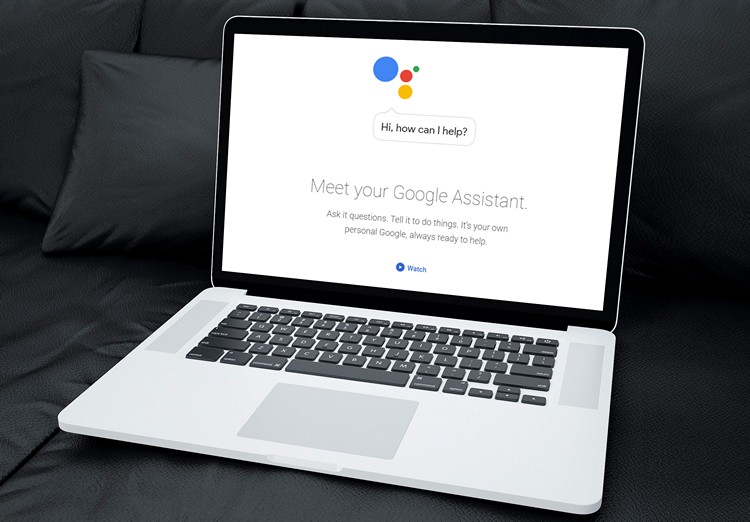
Use Google Assistant on Windows, macOS, and Linux
The process to enable Google Assistant can seem a bit complicated at first glance. However, if you spare a few minutes to follow the steps, you can easily set it up and start using Google Assistant to control your PC. Another aspect worth mentioning is that this client is under development, and hence, you may experience occasional bugs while using it.
1. Register Device for Using Google Assistant on PC
1. To get started, download the latest version of the desktop client from GitHub to your PC. I’m using a Windows 10 machine for this demonstration, but you can download the one based on your system’s operating system.
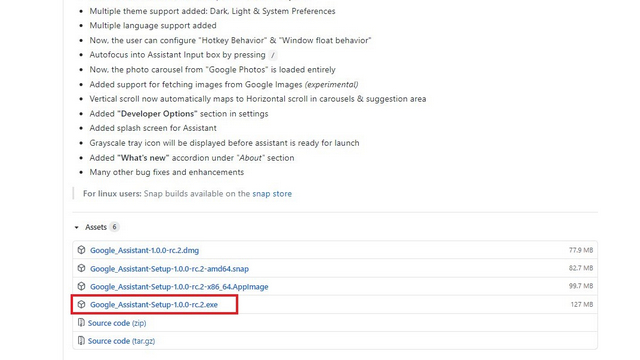
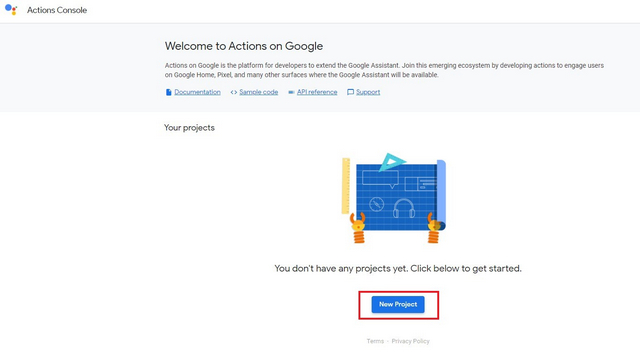
2. Install the Assistant app on your PC. At this stage, it won’t work on your PC and you should configure the backend first. To do that, open the Actions Console from your web browser and click on ‘New Project.’ You should log in with your Google account to access Actions Console.
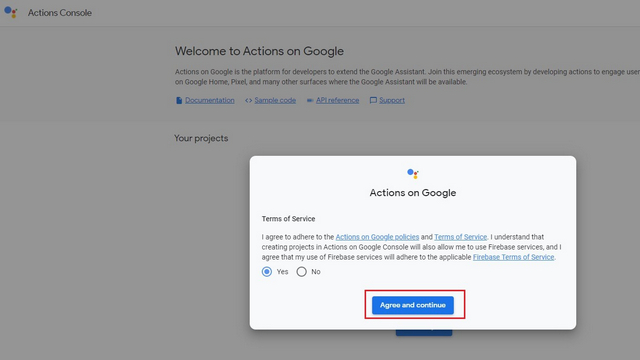
3. Go through Google’s terms of service, choose the ‘Yes’ toggle, and click on ‘Agree and continue.’
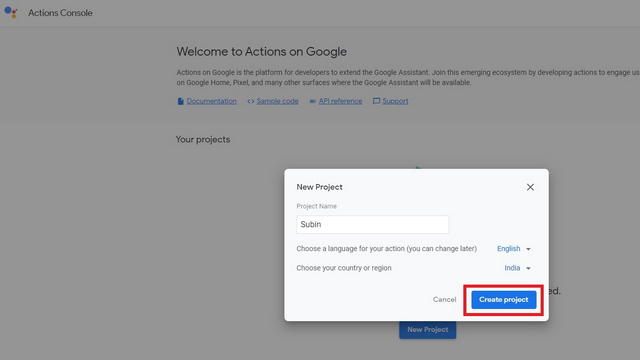
4. When the New Project popup appears, set a new project name, choose the language and your region. After filling in these details, click on the ‘Create project’ button.
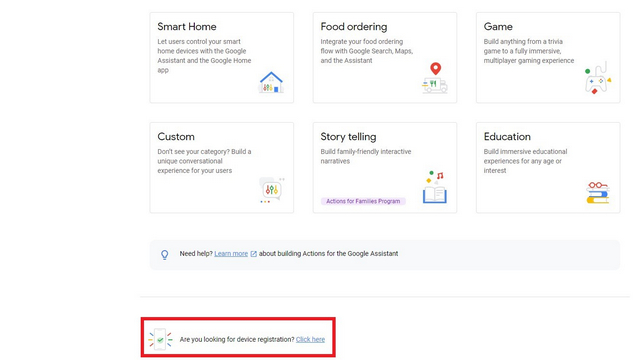
5. Soon after you click Create project, a page to help you set it up appears. From here, scroll down and you’ll notice an option for device registration. Click on the ‘Click here’ hyperlink.
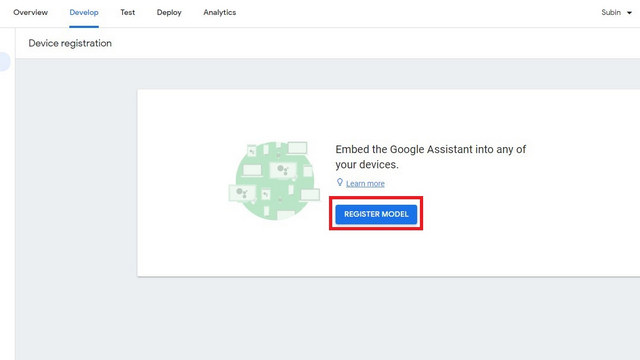
6. You’ll now be taken to the device registration page. Click on the button that says ‘Register Model’ to proceed further.
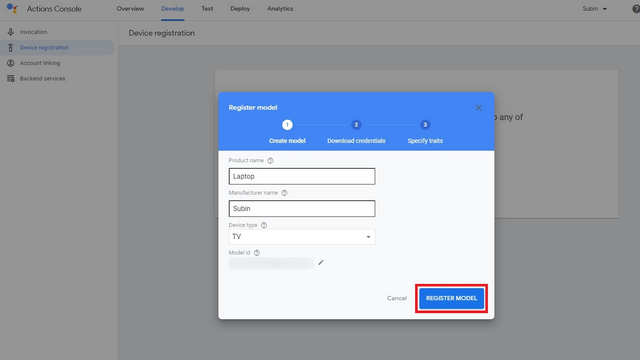
7. You should now set the product name, manufacturer name, and device type. The developer says that you can set any device type. I’ve used TV as the device type and you can choose any other device type if you prefer. Once done, click on the ‘Register Model’ button.
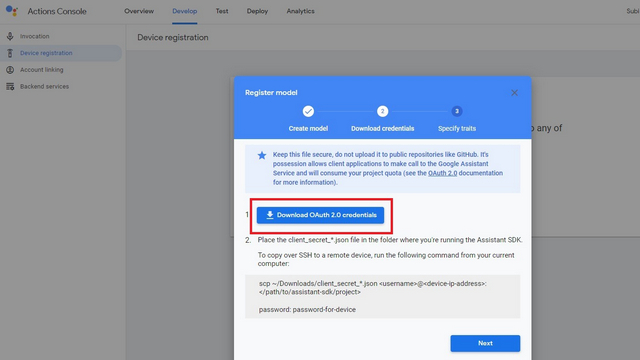
8. We’ve now reached an important step where you should download the key file. This will be a ‘.json’ file and you’ll need this file later to configure the client. Click on the ‘Download OAuth 2.0 credentials’ button to download this file.
2. Enable Google Assistant API and Setup Consent Screen
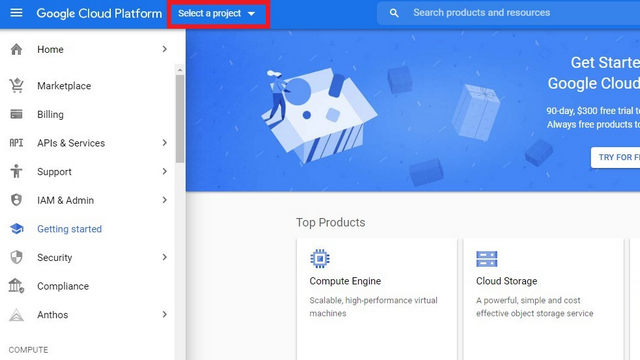
1. Open Google Cloud Platform’s Console and click on the drop-down menu next to GCP’s logo in the top-left corner.
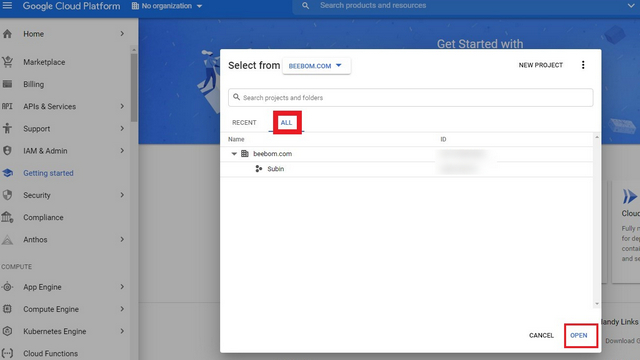
2. You should now choose the project you created earlier. To do so, click on the ‘All’ tab, locate the project, and hit the Open button.
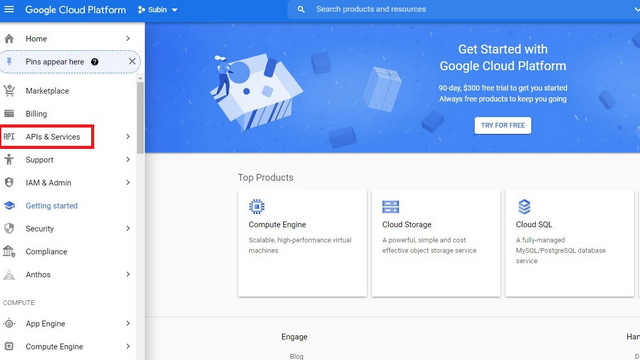
3. From GCP’s left side menu, click on ‘APIs & Services’ to enable Google Assistant API.
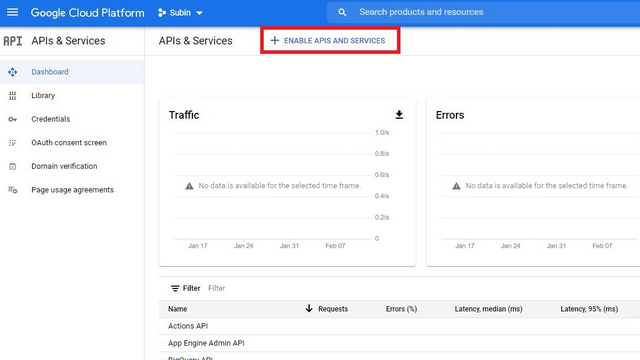
4. From the Dashboard, click on ‘Enable Apps and Services.’ You’ll now be taken to the API library page.
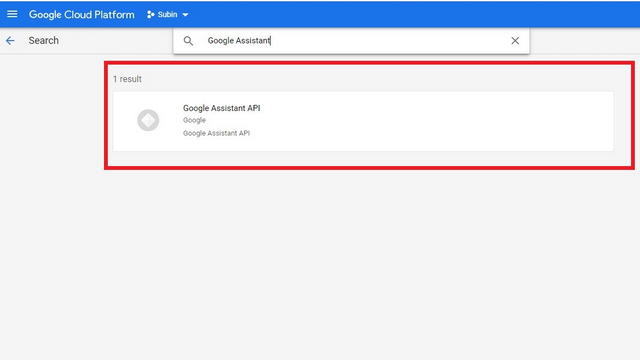
5. On API Library’s search page, type Google Assistant and choose ‘Google Assistant API.’
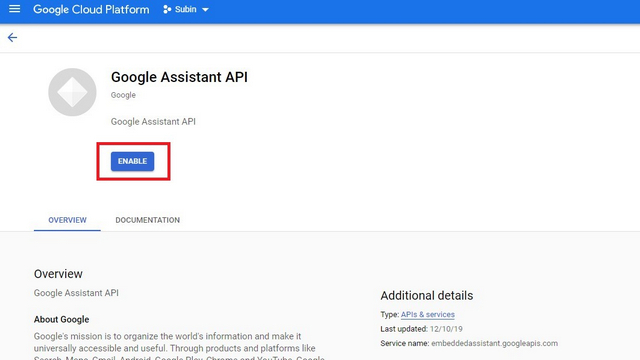
6. Click the ‘Enable’ button to enable Google Assistant API.
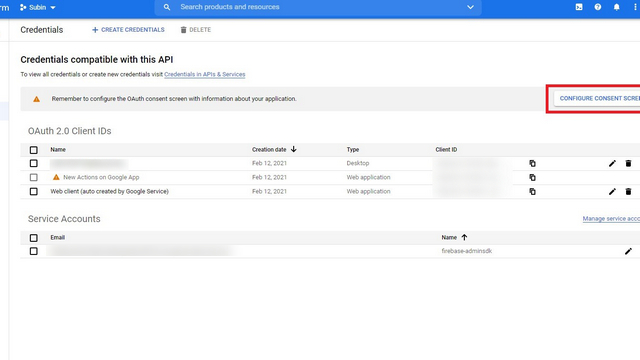
7. When Google Assistant API’s page opens, switch to the Credentials section from the left sidebar and click on ‘Configure Consent Screen.’
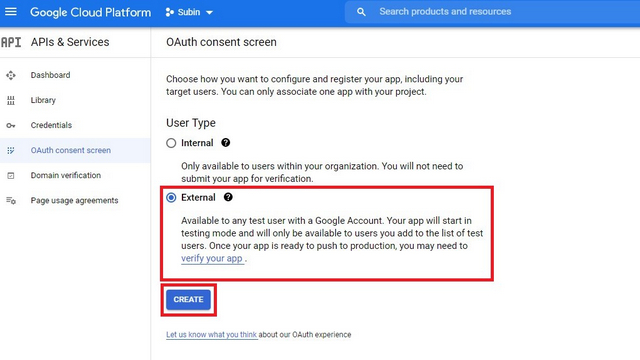
 8. When you’re in the OAuth consent screen, set ‘External’ as user type and click on ‘Create.’
9. On the app information page, choose your email in the user support email section.
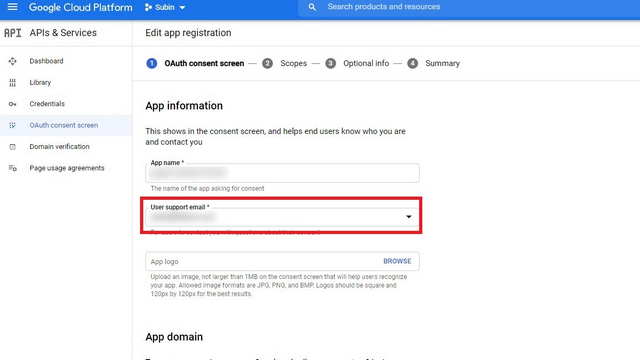
10. Without leaving the page, scroll down, enter your email address in the developer contact information box, and click on ‘Save and Continue’.
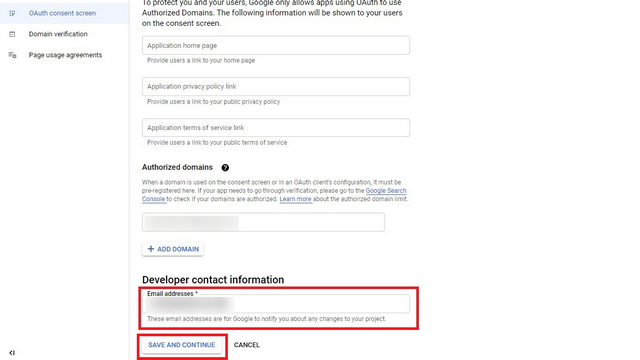
11. You don’t have to alter anything on the ‘Scopes’ page. Click on ‘Save and Continue’ to proceed to the next step.
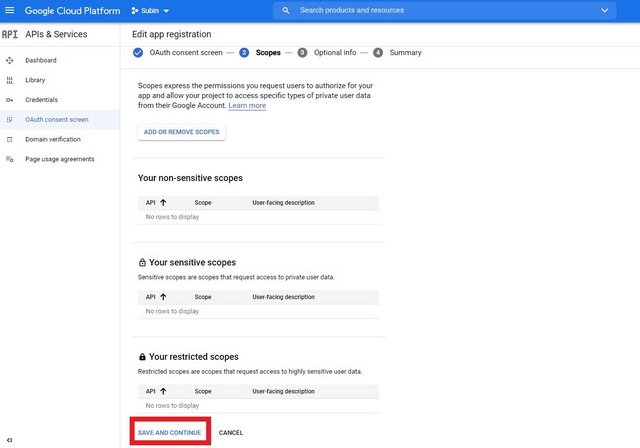
12. The same holds true for Optional Info. Click on Save and Continue to go further.
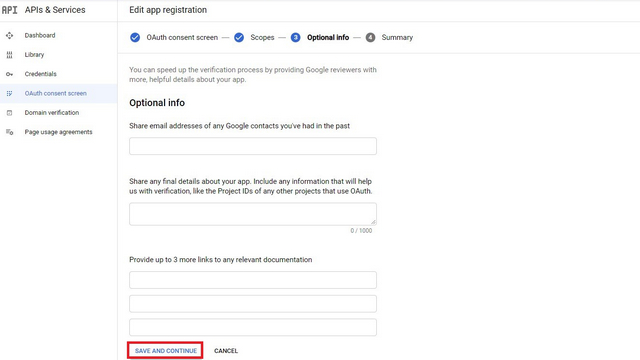
13. On the page that appears now, click on the ‘Add users’ button to add test users.
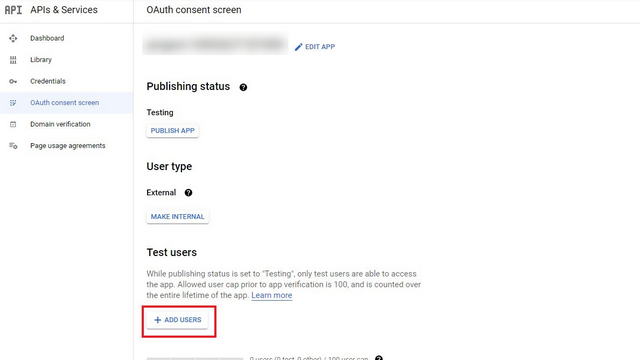
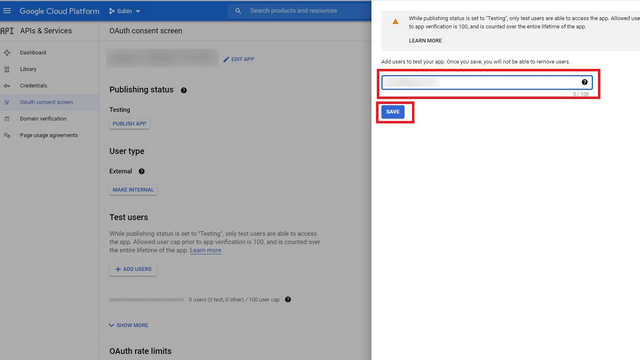
14. You should now add users with the email address. As the developer of the client points out, you can add multiple users by separating email IDs with a comma. I’ve used the email address that I’ve been using in this setup process. Once done, click on Save.
3. Setup Google Assistant Client Authentication
You’ve now prepared your PC to run Assistant as you’ve already completed device registration and configured the consent screen of the API. With a few additional steps, you can start using Google Assistant on your PC.
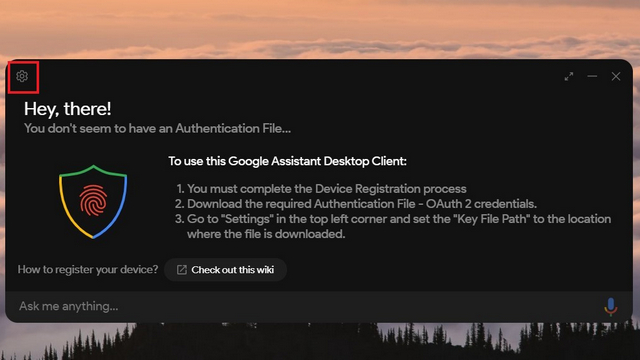
1. Open the Google Assistant client that you installed and head to the Settings by clicking on the gear icon in the top-left corner of the app.
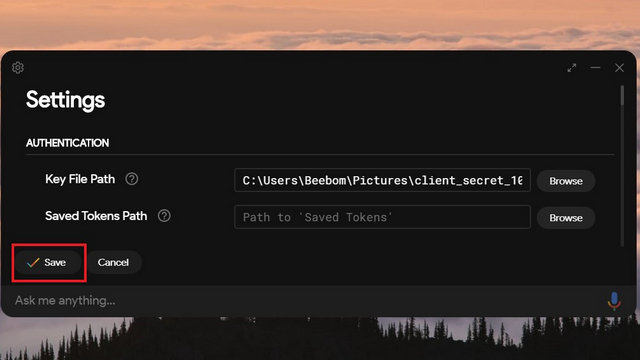
2. You should now use the OAuth 2.0 credentials .json file that you previously downloaded. Click on the Browse button under the Authentication section and set the JSON file’s path to ‘Key File Path.’ You can leave the ‘Saved Token Path’ empty.
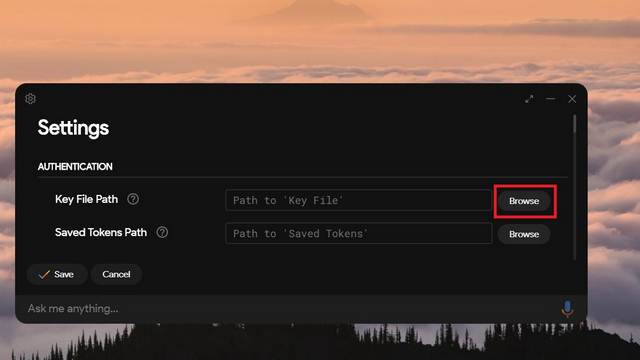
3. After setting the path, click on the Save button.
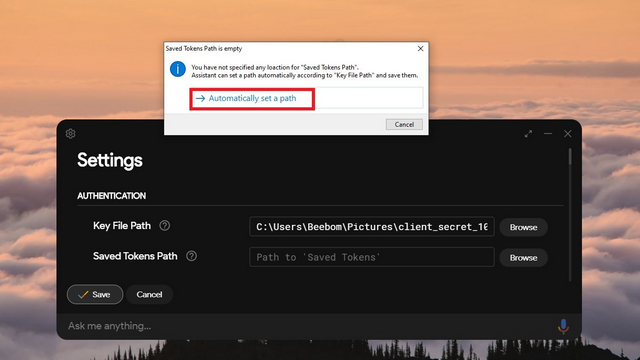
4. The app will now prompt if you’d like to automatically set the saved tokens path. Click on the ‘Automatically set a path’ option to go ahead.
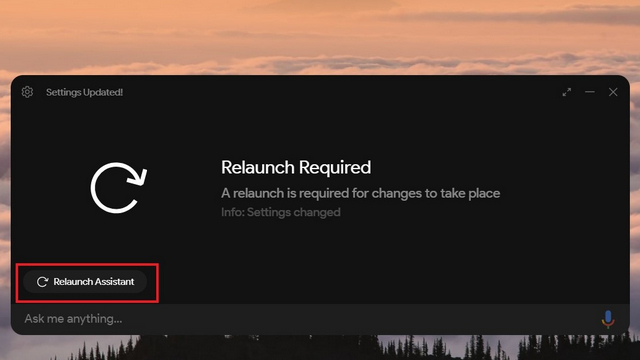
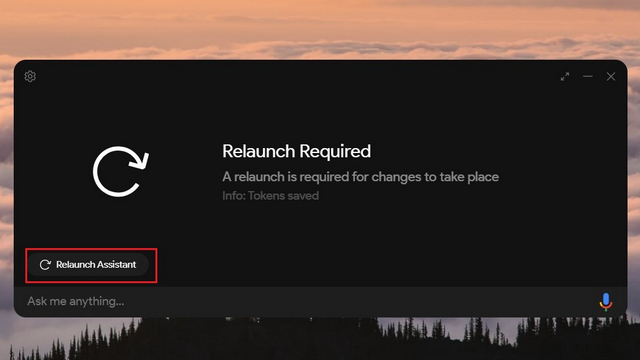
5. You should now restart the application. To do that, click on the ‘Relaunch Assistant’ button in the bottom-left corner.
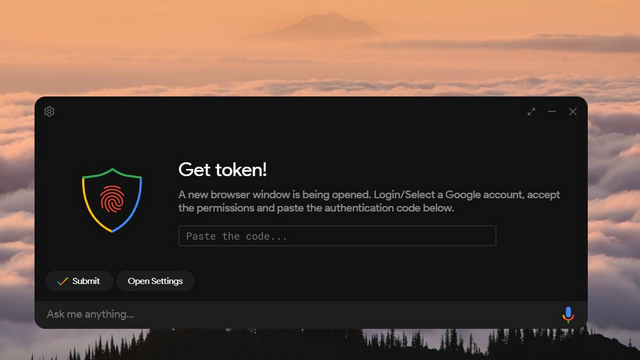
6. When the app opens up again, you’ll see a page urging you to paste the authentication code. At the same time, a new authentication page opens in your default web browser.
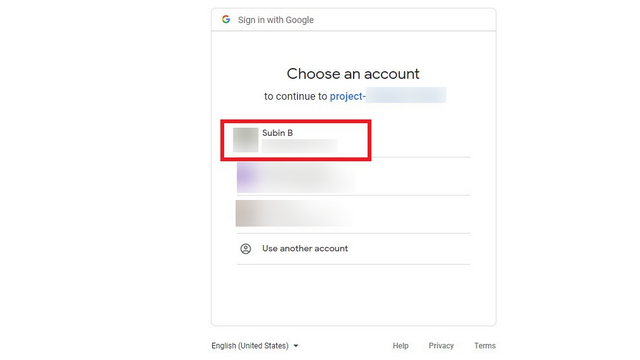
7. Switch to the authentication page and choose your Google account to allow permissions.
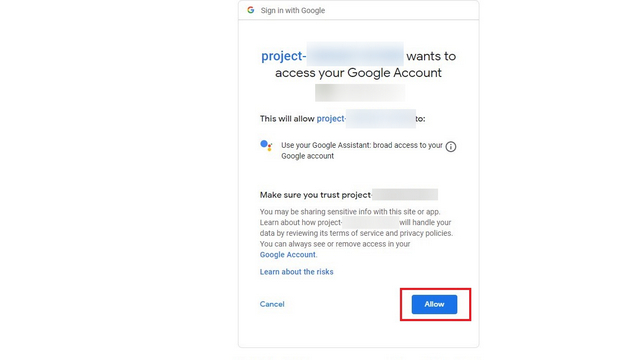
8. Click on ‘Allow’ to grant Google Assistant permissions.
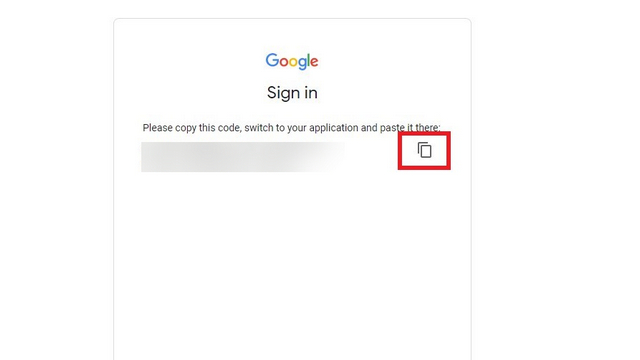
9. You’ll now see an authentication code. Click on the copy button to copy it to your system’s clipboard.
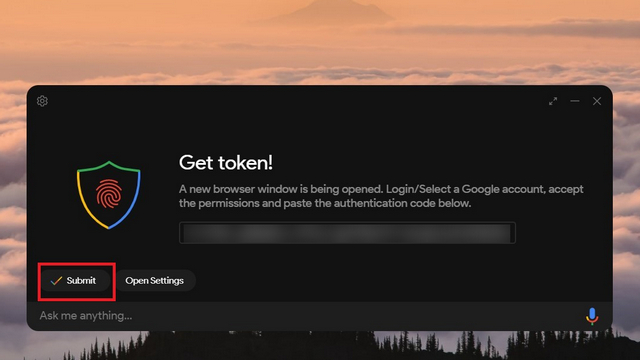
10. Switch back to the client app and paste the code in the given field and click on Submit.
11. You can now restart the Assistant to finally start using it. Click on the ‘Relaunch Assistant’ button to do that.
4. Google Assistant Client Impressions
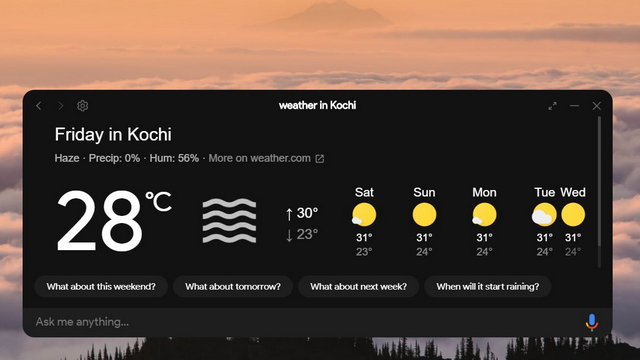
Although unofficial, the Google Assistant client is designed well. It looks elegant, has rounded corners, and you can resize the app horizontally and vertically. You can use the app to issue a variety of basic voice commands, including searches, checking the weather, and smart home controls. On Windows machines, you can access the client with the keyboard shortcut ‘Windows+Shift+A.’
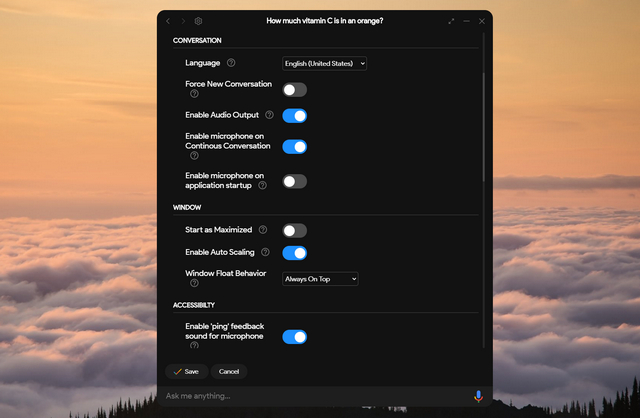
On the app’s settings page, you get the options to tweak several aspects of the app to suit your preference. For instance, you can choose to keep the app always on top of other apps for quick access. In case you want a light theme, you can switch themes from settings.
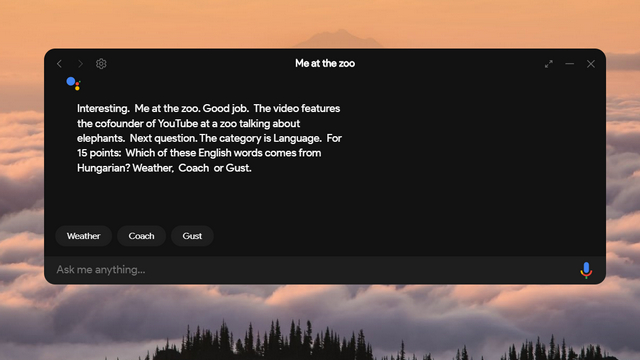
I also tried playing a few Google Assistant games to test its capabilities and it worked just fine. Below is the Google Assistant game ‘Are you feeling lucky?’ through Assistant on a Windows 10 PC:
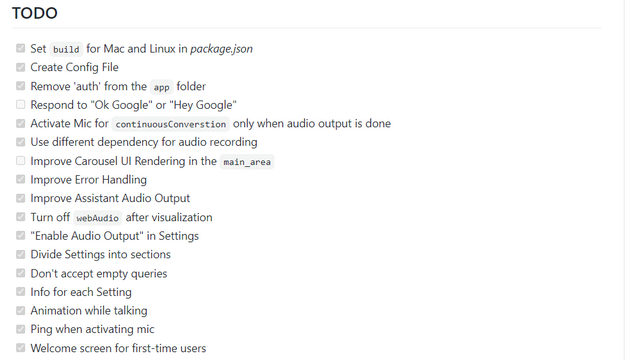
However, there are a bunch of caveats. You can’t use the app to play music from music streaming services, play YouTube videos or Netflix movies and TV shows, or launch apps. In addition, you can’t use the Hey Google / Ok Google command to trigger the Assistant. Instead, you’ll have to manually open the app to type or use voice commands. That said, hotword detection is on the to-do list of the project, and it may come in the future.
Comments
Post a Comment